OIL TUTORIAL:
Mischievous Joy (stage one)
This painting was a commission, and one of those you can really have a lot of fun
with. According to the client's wishes, it was based on a photo of Japanese pop-singer
Ayumi Hamasaki:
The client loved Ayumi-san's mischievously happy expression; it caused him to wonder
what might have prompted her to smile and strike such a pose. Perhaps, she’s playing
with a child - that was the idea we went with. The painting was supposed to have
a traditional Japanese feel as well as show a fusion of different time periods, with
the kimono representing the traditional past, and the funky manicure and hairstyle
the westernized present.
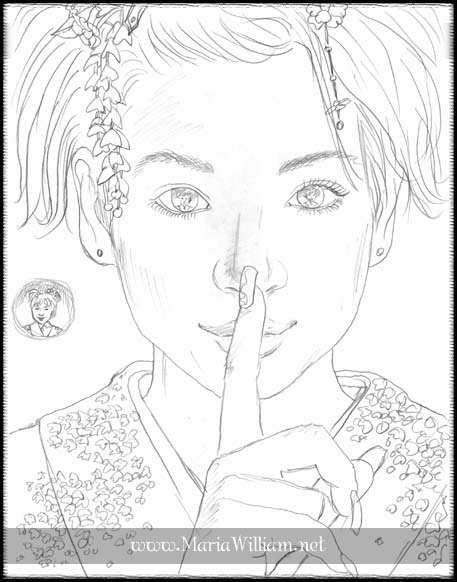
In the rough sketch shown above, I worked out the basic elements of the girl's pose
and the composition, without bothering with many details. The background wasn't a
concern yet either; all I knew was that it would have to be understated, as to not
to overwhelm the face - likely cloudless sky or a smooth wall. The anticipated level
of detail called for a large canvas (18x24"), but at this point the rough is only
8x11". Separately, I sketched the iris with the little girl reflected in it, making
it the size I expected it to be in the actual painting.
NEXT STAGE